Header

Thoughts & Ideas

Why Your Camera Should Always Be With You

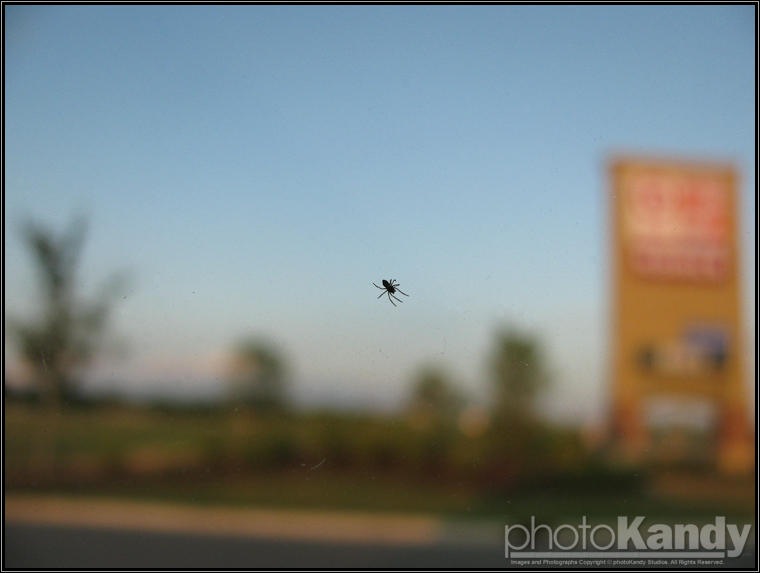
Because you never know what might be around that you’ll think makes a really cool picture. Case in point this little, tiny spider on the windshield of my car, after having gone grocery shopping – I had one chance (the light was about to turn green), and my little point-and-shoot that can do a macro focus at 1cm did the job perfectly. One thing it did pick up a tad too well was the dirt on the windshield – which means my car needs a wash (which it got – see last post).

SX110is_20090726 (1 of 79)

And in case you’re wondering – the spider is on the outside of the car – which is why I could think enough to take the picture. It also helped that he was absolutely tiny (far smaller than this picture lets on). As to his well being after the light turned green, I can’t say – all I know is he was no longer attached to the car after the light turned green. (Poor little guy!)

Look What Happened On The Way Home!

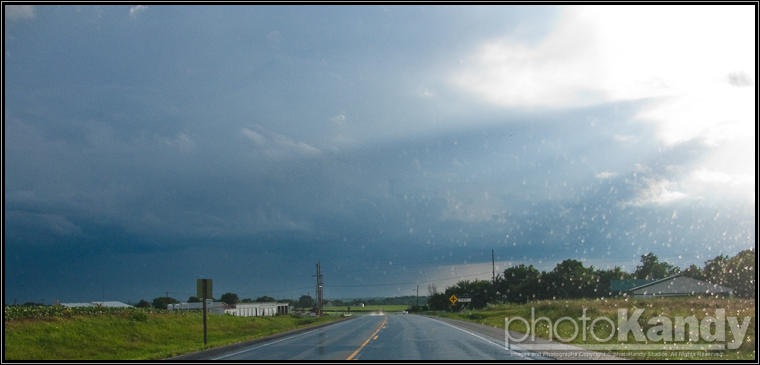
The weather forecast said a slight chance of thunderstorms. Well – it was right! During my drive home, I ran in to this:

SX110is_20090730 (12 of 79)

Words really do not do the above pic justice, and the pic does not do the actual thing justice. That thing was spinning, I tell you. Granted, it was dying (It didn’t stay this way long), but STILL – it was a very nasty cloud. The rain was on the windshield was from a very heavy downpour seconds before sighting this thing.

SX110is_20090730 (42 of 79)

Closer to home, the sun broke out and rendered this fantastic scene, with sun beams breaking through the nasty clouds in the distance. And yes, this after another (of several) downpour – as my windshield reveals.

SX110is_20090730 (54 of 79)

And this is looking back at the monster storm. Okay – so it wasn’t that big of one – probably wasn’t even indicated severe at any point in its life cycle. But seriously – it wanted to be worse. (And now I’m attributing feelings, motive, and character to a storm. What’s that say about me?)

SX110is_20090730 (63 of 79)

Another view of the receding storm – you can see some of the high thunderclouds way in the distance. And all that rain? I think my car sure feels like it went through all of it – it definitely got doused enough times to qualify as having a car wash!

Needless to say it was an interesting ride – rain, clouds, sun, rain, clouds, sun, rinse, lather, repeat. I’m just thankful that the storm didn’t have a chance to get nastier, and that it had stopped raining by the time I got home so that I didn’t get drenched!

Photography 101: What is Exposure?

Exposure itself is a pretty simple idea – your camera (assuming it is digital) has a sensor buried inside that is light-sensitive. When you take a picture, you expose the sensor to light for a given period of time. However much light gets in determines the brightness (or darkness) of the resulting image.EV-Triangle

Of course, in real life, simple things aren’t always made simple. In general, there are three things that control exposure – and these things make up something called the “Exposure Triangle”:

  • Shutter Speed
  • Aperture (f/stop)
  • ISO (sensitivity)

Each one of these items together determines your exposure. If you change any one without changing the others, you will see radically different exposures because all three work together. Each of these items also has an impact on other factors in the image (such as noise, depth-of-field, and stopping/blurring the action), which we’ll cover in a post on each  (Each one could fill a book!)

Shutter Speed

Quickly, though, each of the items above help determine the exposure in different ways. “Shutter Speed” controls how long the shutter is open – thus controlling how long the sensor in your camera is exposed to light. If the shutter speed is short, then only a little light can fall on the sensor. Conversely, if the shutter speed is long, more light can fall on the sensor. However long your shutter needs to stay open depends upon a few factors, namely:

  • The amount of light available (Is it day? Is it night?)
  • How still the camera is (are you hand-holding? Is the camera mounted on a tripod?)
  • Your Aperture and ISO settings

What matters most is that for the time the shutter is open and exposing the sensor, the camera itself should not move (unless you are after some artistic effects). This also applies to the scene the camera sees – if anything moves while the shutter is open, it turns into a blur. (And sometimes this is what you want. But not usually.) The biggest cause of blur is camera shake – the fact that we humans aren’t very stable and can’t hold anything still for a long period of time – thus, if we are handholding, a fast (short) shutter speed is a good idea.

A good rule of thumb: the shutter speed shouldn’t exceed the inverse of your focal length. For example – if my lens is at 50mm, then my shutter speed shouldn’t be longer than 1/50s. If I’m zoomed in at 200mm, then I can’t go slower than 1/200s. But if I’m zoomed out at 18mm, I can get by with 1/18s. If you want to be safe, halve the amounts – at 18mm, don’t go longer than 1/30s, at 50mm, don’t go longer than 1/100s, and at 200m, don’t go longer than 1/400s.

Aperture (or f/stop)

The next factor is the "Aperture”, or “f/stop”. This controls the amount of light allowed to get through the lens – think of it like a pipe. A large pipe can let a lot of water through, but a small pipe can only let a little light through. The same holds true for the aperture. A large aperture lets a lot of light through, but a small one only lets a small amount through. We usually express the size of the aperture in terms of “f/stops”.

f/stops are really a ratio between the size of the aperture and your focal length. Because of this, things get a little wonky when talking about them – especially for beginners. This is because a small f/stop means a large aperture, and a large f/stop means a small aperture. The benefit of wrapping your head around this is that f/8 is the same as f/8 on any camera and lens– it lets relatively the same amount of light through to the sensor.

The scale of f/stops is usually listed as it appears below. The important thing to remember is that increasing by one f/stop is the same as halving the amount of light that can get through to the sensor. Conversely, decreasing by one f/stop is the same as doubling the amount of light that can get through to the sensor.

The F/stop Scale: f/1.0, f/1.4, f/2, f/2.8, f/4, f/5.6, f/8, f/11, f/16, f/22, …

Most cameras let you get in-between the stops – usually by 1/3 or 1/2 stops. Repeating the scale above including all the 1/3 increments gives us this list:

f/1.0, f/1.1, f/1.2, f/1.4, f/1.6, f/1.8, f/2, f/2.2, f/2.5, f/4, f/4.5, f/5.0, f/5.6, f/6.3, f/7.1, f/8, f/9, f/10, f/11, f/13, f/14, f/16, f/18, f/20, f/22, …

Just remember that the smaller the f/stop, the more light is entering the camera, and vice versa. Also remember that your lens may or may not be able to reach the lowest (or highest) f/stops – this is usually indicated in the manual for your lens (or camera).

There are creative reasons you might want to use a small f/stop, vs. using a large f/stop, but we’ll cover these in a later post.

ISO

The last item is “ISO” – how sensitive your sensor is to light. In the digital world, this is really just amplification – think of recording a soft-spoken individual, then amplifying the recording to make them louder. The problem with amplification is that you don’t only amplify the person, but you also amplify everything else, including background noise. What was once a nearly inaudible hiss may quickly become a mighty roar, quickly obscuring the words of the speaker.

The same applies to the ISO setting in your digital camera. The lower the ISO, the less noise. The higher the ISO, the worse the noise gets, to the point of obscuring detail in the image. Most cameras offer a range of ISO 100 – 1600. (Some go as low as ISO 50; several can go higher – like ISO 6400). The typical ISO range is expressed like this:

ISO: 50, 100, 200, 400, 800, 1600, 3200, 6400, …

While most cameras only let the user pick from one of these settings, when using “Auto ISO”, the camera is free to pick any ISO setting, including ones in-between. (Which explains why you might see a picture at ISO 320 or ISO 64 instead of ISO 400 or ISO 50.)

So – you might ask – if using the lowest ISO generates the best image quality, why would I ever use anything else? The answer is that if you are shooting in low light (at night, or even just indoors), a low ISO may make your shutter speed too long, and you may not be able to get a sharp picture – so if you are hand-holding, or taking pictures of a sports event and need to freeze the action, you need to use a fast shutter speed – which means increasing your ISO (assuming you’ve already set your aperture as wide as it will go). It quickly becomes a trade-off of image quality (noise) vs. getting the image at all. It also depends on your camera – a dSLR with a large sensor will generate less noise at high ISO settings than will a point-and-shoot with a small sensor with the same number of megapixels as the dSLR.

Marketing Alert: Big numbers sell – fact of life. Unfortunately, camera marketers have latched on to the “megapixel” as the “big number” – which means that most people think a 15-megapixel camera generates better images than a 9-megapixel camera. This is, unfortunately, not true, because it really boils down to the number of megapixels and the size of the sensor. If the sensor remains the same size, increasing the megapixels will result in a noisier image – not a better one. This is why older point-and-shoot cameras can often out-perform their younger siblings when in low-light situations – less megapixels, meaning less noise. It is also why professional photographers buy dSLR or even medium-format cameras – a bigger sensor means more room for those megapixels, and thus less noise. (Of course, newer cameras offer their advantages – better battery life, better screens, HD video, etc. Just don’t let the number of megapixels be your only reason for picking a camera.)

ISO80-ISO1600-100%

Above: Example of increasing ISO and the resulting increase in Noise and loss of Detail
Camera: Canon Powershot SX110IS, 9.0 Megapixels, 1/2.3” sensor. A dSLR would
generate significantly better results at high ISO.

Exposure Compensation

There is one other item that I didn’t include in the list above: “Exposure Compensation”, or “EV Comp”. The reason this exists is simply because the camera has to guess at the right combination of settings to use in order to get a “properly” exposed image (one where the subject is not too bright, but not too dark either). Sometimes the camera gets it wrong, and the photographer needs to compensate – and it is here they use “Exposure Compensation”.

Essentially this controls the shutter speed – so the photographer could just adjust the shutter speed for the same effect – but not all cameras make this easy, practical, or even possible. (Especially point-and-shoot cameras.) Instead they make it easier to use the Exposure Compensation button (usually a +/- button). Usually a camera will offer a range of -2 stops (four times darker) to +2 stops (four times brighter) with 1/3 stops in-between.

EV-Comp-Example

Above: Example of Exposure Compensation, from -2 to +2 EV.
Camera: Canon Powershot SX110IS, 9.0 Megapixels, 1/2.3” sensor.

One Final Word about Exposure

I lied. Ha!

If you’ve read this far without your brain exploding, congrats! And if you haven’t, then come back again in a few days and try to read a little further. It gets easier, I promise!

As far as exposure goes, we do have a few terms we like to pair with the word in the photography world. Understanding them will help you understand what everyone else is talking about:

  • “Under”-exposed: The subject in the image is too dark. See the above image – “-2EV” is definitely under-exposed.
  • “Over”-exposed: The subject in the image is too bright, and may have lost detail due to “highlight clipping”. See the above image – “+2EV” is definitely over-exposed, and the whites of the subject have lost significant detail, meaning that detail proably can’t be recovered - (hence the term, highlight clipping).
  • “Correct” exposure: while this is in the eye of the beholder (if the image is what you wanted it to be, it’s correctly exposed), this would mean the subject isn’t too bright or too dark. In the above image, anything between “0EV” and “1EV” could be considered to be correctly exposed, depending upon what I, the photographer, wanted.

Metering Modes

So there you have it – almost. There’s an important detail I’ve left out in this discussion, and that’s called “metering modes”. There are several different modes, and each controls how the camera sees a scene. Nearly every camera lets you change the mode you use, but suffice to say that there are generally three modes on most cameras (some have four or more):

  • Evaluative, Matrix, Pattern
  • Center-weighted Average
  • Spot

The Evaluative/Matrix/Pattern mode essentially looks at the entire scene, goes through a big database, and determines the best settings to use based upon what it sees. If the top of the image is bright, the bottom is dark, and there’s a spot in the middle that is in-between, chances are you’re photographing a person against bright sky and dark landscape – and the camera picks settings that will make the person not too dark and not too bright.

The Center-weighted Average mode takes the center of the image and weights it above everything else in the image. Here the camera assumes that the center of the image is what you are exposing for, and adjusts the settings appropriately to keep whatever is in the center not too bright, and not too dark.

The Spot mode takes a tiny portion of the center of the image and bases all the settings on that tiny little area. If the area is dark, but the rest of the image isn’t, you’ll end up with the dark area properly exposed, but the rest will be way too bright. (And vice versa, if the area is bright, but the rest isn’t, you’ll end up with the bright area properly exposed, but the rest will be dark.) Not too long ago, this was how all cameras that did automatic exposure worked – but now the Evaluative/Matrix/Pattern mode is generally the best choice. (Really – lots of research, effort, and time has gone into making the evaluative/matrix/pattern modes work well – definitely more time than you yourself have spent figuring all this out.) About the only time you’d use Spot now is if you were taking pictures of small bright lights (either candles, Christmas tree lights, etc.), and wanted everything but the lights to be ignored.

Ok – I’m done, now, I promise!

Well – until the next time! None of this is very hard to figure out, but it does take time and lots of practice. But that’s a benefit of this digital world – if you take a picture and don’t like it, it didn’t cost you anything but a few seconds to create. You can delete it, try another setting, and try again, all without wasting money on film, developing, and printing. And that’s the only real way to improve your photographs – take lots of photos, practice with your camera settings, and experiment.

And so, until next time – keep writing with light!

Beauty All Around

All too often we go through our lives without really stopping to appreciate those things that are around us – even though they may be small things or large things. They might be things we take for granted – like trees or flowers, or even things we find annoying or a bit frightening (like spiders, bees, or other creepy-crawlies). And yet, if we would pause but for a moment, we might just find out that there are truly beautiful things all around us – just waiting to be discovered.

If you are a photographer, chances are you’ve specialized in certain types of photography – like weddings, or sports, or portraits. And if you haven’t – or are discovering your niche – that’s fine too. Regardless of where you are in your photography, I challenge you to take some time and just look around you – you might be very surprised at what appears before your eyes.

Below are some shots taken on a photowalk at a small park in southern Illinois. I never got beyond the entrance – there were simply so many little flowers, bugs, beetles, bees, and dragonflies that were beautiful subjects that I didn’t need to go any further!

Bee on Flower: This Bumblebee was getting all the nectar he could possibly get by crawling around on these and other close flowers. Apparently  he'd had too much after awhile, since he began literally falling off these things! (1/250 sec @ f/8; 50mm ISO 400)

I’ve officially been bitten by the love of bumblebees. Not that I’m out to pick one up, mind you, but they are just so difficult to photograph well. The above image is one of my best bumblebees to date, and given the interesting flower he’s on, it makes the image all the better. I shot this with a 50mm lens at f/8 to ensure that I would get both the bee and flower in good focus.

Pretty Multitude: These little flowers were all over, just sunning themselves, or inviting one of several bumblebees over to play. (1/500 sec @ f/8; 189mm ISO 400)

The above image is fairly simple – just some yellow flowers cloistered together. But look at all the detail in each flower – it simply boggles the mind!

Dragonfly on Flower: Apparently he thought it was pretty and decided to land for a short time - which is all it was, because I only got one shot off. (1/160 sec @ f/9; 200mm ISO 400)

Given that there were dragonflies around, well – I just had to try and get some pictures of them. I’m not sure, but they may be harder to get than a bumblebee. Some where quite content to sit on a stem for awhile, but others would land and fly away, barely giving me enough time to catch a shot. The above was one of the latter – he landed on the flower, I took a picture, and he was gone. I will say this: having a nice long lens helps to capture these guys if they are staying still – you’re less likely to spook them when you are four feet away versus being six inches away! (By this shot, I was using my 70-200mm f/4L lens.)

(Side note: from this angle, even f/9 is insufficient to keep the entire dragonfly in focus; only his body and far wings are focused; the wings closer to us are blurry. But had I lingered to stop down the aperture, he’d have disappeared, and the shot would never have occurred.)

Solitary Beetle on Flower: I'm not sure what this beetle is doing alone (because a few stems over there was quite a crowd of them), but maybe he just wanted some alone time? (1/320 sec @ f/7.1; 200mm ISO 400)

The colors in this beetle fascinate me. There are white spots, a bronze back, and a shimmering green head, which, as far as I’m concerned, makes this guy absolutely gorgeous. (And so is the flower, in case it feels left out!)

Flower II: (1/500 sec @ f/5.6; 200mm ISO 400)

Simplicity works to your favor too – here the flower is the only thing in focus – everything has been thrown out by using a fairly wide aperture (f/5.6) at a long focal length (200mm), but had the background been closer, it would not have been as out-of-focus. It took some creative framing to get the angle on this guy just right.

Flower III: (1/200 sec @ f/8; 200mm ISO 400)

It was this flower’s color that attracted me at once – the yellows, pinks and magentas are absolutely stunning. A smaller aperture (f/8) ensured that a good portion of the flower was in relative focus; f/4 would have resulted in a much blurrier flower. As it is, if you look closely, you’ll notice that the focal area doesn’t go much beyond the stamens and a bit of the petals. Even so, I like it.

Bee Exiting Flower: I'd wanted to get this shot all day, but the bees simply wouldn't cooperate. Finally, by some miracle, he was exiting at just the right time, and I was able to record the moment. (1/1250 sec @ f/8; 200mm ISO 400)

I’d spotted bumblebees doing this earlier in the photowalk – and then I wanted to capture one actually doing this – exiting a flower after collecting some pollen. I waited and waited and waited (well – I took pictures and took more pictures, and yet more pictures), and finally caught this guy at just the right moment crawling out of the flower. There’s something cute and fuzzy about him, no? (He might disagree… having a stinger and all!)

Last Dragonfly of the Day: The reflections from the setting sun were what attracted my attention on this dragonfly. (1/320 sec @ f/8; 200mm ISO 400)

More often than not, the dragonflies would land on sticks instead of flowers – but they still produced interesting shots. I was back at f/8 to ensure that most of the dragonfly would be in focus, but what really drew me to this particular shot was the way the setting sun was reflecting off his wings – the colors in there are gorgeous.

Bending in the Wind: I'm not sure what these are, but aren't they beautiful? And when the light hit them just perfectly, I had to take several shots. (1/640 sec @ f/8; 200mm ISO 400)

These wispy plants just go to show that even the most ordinary looking thing can be gorgeous when the right light is around. Having got down at just the right angle, the sunlight hitting these plants was absolutely wonderful. Look closely – there’s an astounding amount of colors there.

Beauty doesn’t have to be found in nature, either – just look around your home – there are bound to be fantastic opportunities for creative shots there as well. If you have pets, then opportunities abound, but even the ordinary can be turned extraordinary with a creative angle and creative lighting.

You can see all the processed images taken at this park here, or you can click on any of the images above for a larger view.

Until next time,

Keep Writing with Light!

Stormy Days

I happen to like storms. I don’t know why – I just always have. Maybe it’s because I feed, somehow, off of the electricity in the air, or am excited at the prospect of watching something absolutely awe-inspiring and terrifying, with powers on display far greater than my own. Who knows. I’m weird like that.

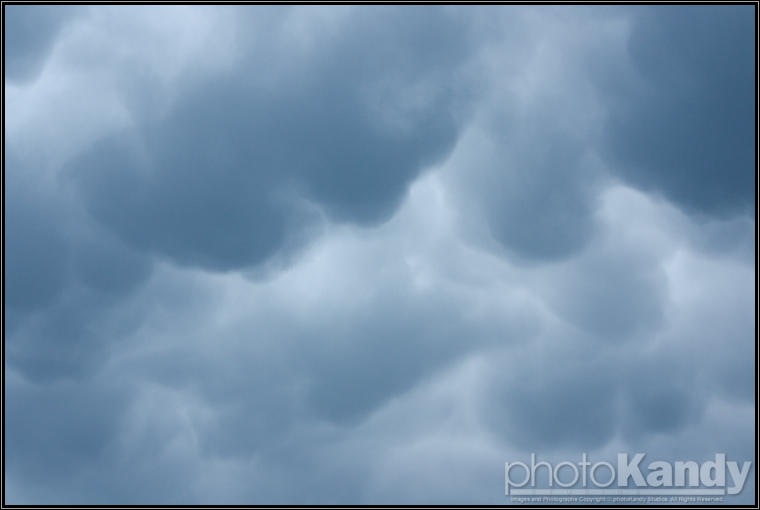
So, on Friday, we had a whopper of a storm cell move through. I was fortunate enough to catch a couple shots of some thunderclouds in the distance, as well as those boiling (yes, I mean boiling) overhead, and then some shots once I got home. So without further ado, here’s some of the shots from the storm:

Storm_20090619 (6 of 49)

Storm clouds in the distance; power lines in front. I don’t think my city ever lost power, but I bet someone did… 

Storm_20090619 (9 of 49)

Thunderhead up close and personal. Except, he’s actually several miles away – closer to Aurora, IL. The shape, however, was what most intrigued me – hence the shot. 

Storm_20090619 (11 of 49)

And this – this was what was boiling directly above me. Yeah – fun stuff! At this point, though – no rain yet. I didn’t begin to see any lightning until I hopped back in my car and continued on down the road a while. Even so, I didn’t take a million pictures of this stuff. Better safe than sorry, right? 

Storm_20090619 (20 of 49)

The view out my car as I pull into town. Rain, rain, rain, rain. Everywhere rain. And the wind. Goodness-gracious-me. At this point we were under a Severe Thunderstorm Warning – mostly for the wind gusts – which were, in some areas, over 60 mph. I don’t know that it was that bad in town, but leaves and other debris was definitely flying around, so it was strong, regardless. 

Storm_20090619 (32 of 49)

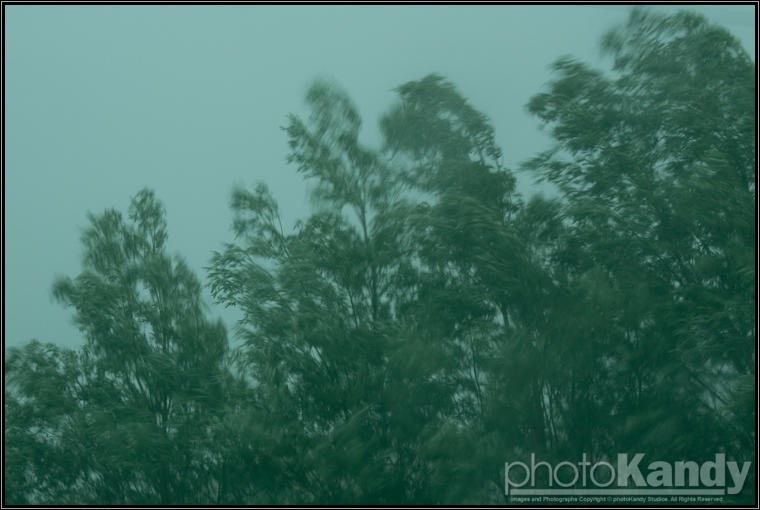
After I parked in front of my apartment, it was pouring torrents and torrents of rain. So, to wait a little while in the hopes that it would slow down a bit, I snapped some shots out the car window. This was a clear one with a slow shutter speed so that the movement of the trees in the wind can be seen very clearly. This was probably the height of the wind part of the storm as these poor things were going all over the place.

Needless to say, I finally made it back into my apartment (else I couldn’t have processed these images), but it was quite the nasty storm cell. It went on to do quite a bit of damage closer to Chicago, from what I heard on the news, which just goes to say how dangerous these severe weather events can be. And how lucky I was to have made it close to home before really getting pounded by the wind and the rain!

Resources: Software Tools and Utilities

As I find new software that I find useful, I’ll add it to this post along with a short description and the price (if it costs anything) as well as a link to the company.

Adobe Photoshop Lightroom 2.3

imageI use, love, adore Lightroom. It is just flat-out the best workflow and RAW/Image manipulation software for me. (That’s not to say it fits everyone – just that it works for me.) It’s a bit pricey at $299, but if you are serious about managing and processing your photographs, then it is money well spent. 

It has a fantastic library module where you can import, manage, categorize, label, and essentially keep track of all your photos. Once categorized, you can take a picture into the develop module to apply any number of various effects to the image – control the white balance, the saturation, the sharpening, vignetting, etc. While these effects aren’t something you couldn’t achieve in any other photo-editing program, the ease with which Lightroom allows you to make the changes is, in my opinion, what sets it apart from everything else – especially if you are working with RAW images – there’s just so much you can do creatively. Beyond the Develop module, you have web, print, and slideshow modules to play with as well.

As far as the images on my own site, nearly all of them will have been processed via Lightroom. Occasionally something will need to be pushed into Photoshop, but believe me – it’s rare that I need to go that far.

Adobe Photoshop Lightroom is available for a free 30 day trial, after which you can purchase it for $299 from Adobe directly. View more info…

Adobe Photoshop CS4

image Adobe Photoshop CS4 pretty much goes hand-in-hand with Adobe Photoshop Lightroom. They integrate very tightly, and LR has support for PS’s smart object feature. If you can’t do something in Lightroom – you can do it in Photoshop. It supports everything you’d ever need in a photo editor, and includes something of large import for those who wish to print their creations – soft proofing. This enables you to get a “preview” of the photo as it might look on paper. It also lets you know if there are any colors that may not be printable (called “out-of-gamut”).

It’s a tad bit expensive at $699, however – though well worth it. However, if you can’t quite spring for that, you should look at several other tools, including Corel’s Paint Shop Pro, Photoline, Paint.NET, and more.

Adobe Photoshop CS4 is available for a free 30 day trial, after which you can purchase it for $699 from Adobe directly. View more info…

Microsoft Web Expression 2

image This is a fantastic tool for publishing websites. While it does support a WYSIWYG method of creating pages, I prefer to work solely in the source view.

While the tool has its quirks, it also makes editing and maintaining my sites very efficient. The full version is $299, but if you’ve ever owned Frontpage, Office, or several other programs, you can get it for as low as $99 as an upgrade. You can try it for free, as well, for 30 days. View more info…


Note: all trademarks are owned by the respective companies. The product images are © their respective owners. My evaluations of the software are my own and based solely upon my own experience. There is no connection between the companies making this software and me promoting the software – just my genuine appreciation for a well-made product I happen to enjoy using.

My Perfect Compact Camera

image
Is there such a thing as a perfect anything? No, but it would sure be nice to have something awfully close, wouldn't it?

If you were paying attention to any of the new camera announcements made this past week, you probably heard an awful lot about the Olympus E-P1 (image on the right, from the Olympus website). It looks very retro and stylish, and sports a sensor larger than most point-and-shoot cameras, although a tad bit smaller than most dSLRs. (The exception would be Panasonic G1 and GH1, but neither would I classify either of those models as a true dSLR - mainly because there's no mirror in them - but enough quibbling.)

I've been looking for a compact camera to replace my aging Panasonic Lumix LZ8. It's a decent camera, but it is also a few years old now, and, to be frank, didn't take great pictures (very, very noisy). It works as a P&S, but I want something better. And so I have refrained from making any decisions until Olympus made their announcement, in the hopes that their new camera would be the one I would buy.

I was all set until I found out the following things about this beautiful camera:
  • It has no flash. It has a hot-shoe, but no flash. (Granted - this is not a deal-breaker. But for the price - which you'll see in a moment - it should have flash!)
  • No optical viewfinder. Yes, you can buy one that sits atop the hot-shoe, but it does not represent the true image capture. (Granted, most OVFs on compacts don't either, but they are at least a bit closer to the lens. This thing won't be.)
  • No electrical viewfinder. This means the only way to frame my image would be to use the LCD - which, frankly, leads me to my next point...
  • Lousy LCD. Seriously. For the price, this thing should have 930k pixels on it. Instead it has 230k. Not. Sufficient. At. This. Price. Range.
  • ... which is $750 minimum. That's no lens - just the body. No extras. Huh? What? !!!!???? If you want the 3x zoom the price is $800. If you want the ultra-compact pancake 17mm lens instead, the price is $900. If you want to add a flash, add another $200. And if you want the optical viewfinder (which, btw, you can't use if you are using the flash... this should be obvious), add another $99. A fully decked-out camera is going to cost something like $1,200. Um. No.
That's not to say that this thing isn't gorgeous. It is. That's not to say that I wouldn't love to have it. I would. But can I justify laying out $1,200 on a compact camera when I could put that money towards a nice "L"-series lens, or towards a new dSLR body? No. Could I justify it at all, knowing what my compact is really intended for? (And this is the intention: a throw-in-your-purse camera you can take everywhere and anywhere but still takes great pictures...) No. Not at $1200. Not at $800. Not even at $700. $500 and you might get there. (Honestly I'd prefer $300. But that's not likely realistic. The companies do have make some money.)

I understand the sensor is expensive. But at $750+, this thing should've been decked out from the start. Glass isn't cheap either, but at least include the 3x zoom in the price, or go fixed-length only. Include a crappy flash. Include a superior LCD screen. And include an EVF or OVF so that I don't have to rely on a 3.0" LCD screen to compose my photos. (Believe me, there will be a point, no matter how anti-reflective that LCD screen is, that it will be unusable in the light you have available. Not good.)

Okay - this is coming off more as a rant than anything, and that's not really the intent. My intent is to find the best P&S that I can get for a price that won't break the bank. Nothing out there will be perfect. But is it too much to ask a camera maker to make a $500 compact that has all of the features below? Then it would be perfect:

  • $500 price point
  • Large sensor (no smaller than 1/1.6", but preferrably APS-C/micro-4/3rds sized)
  • Nice zoom lens (does not have to be interchangeable for me...)
  • EVF/OVF. Absolute Must. I can't rely only on the LCD.
  • Nice LCD screen. But it no longer has to have 930k pixels on it at this price point, esp. when I'll be using the EVF/OVF 90% of the time.
  • RAW output
  • Full manual controls (or, at least Aperture Priority, though the smaller the sensor, the less useful this becomes for controlling DOF)
  • Manual focus
  • Flash. Seriously. There's no excuse not to have a little flashbulb in there. Yes, it will produce harsh, horrible light, but that's better than nothing.
  • Hot-shoe. Because I'll want to put a better flash on it.
I could add a lot more to that list, but then this post would be longer than it needs to be. (It already is.) At the moment, then, it seems my only possible cameras are the following:
  • Canon G10 (or G9, but oddly enough, the G9 is more expensive than the G10 is, at the moment)
  • Panasonic Lumix LX-3 (More $$$ than I want to go, but gets good reviews. Note that it has no EVF, but it does have a 460k LCD. Still, I'd prefer an EVF/OVF.)
  • Sigma DP1 or DP2 (Except for the fact that the LCD is 230k, no EVF/OVF, and handles like molasses.)
I'm not sure, but I think the mind just got made up. Canon G10. I want (no, need) an EVF/OVF, and the G10 has an OVF. It won't be like the captured image, but it's better than relying totally on the LCD. And that LCD? 460k pixels. All at around $500. It's not my perfect compact (small sensor, slow lens, ...) but maybe it is close enough.

If I get one, I'll let you know. If I get something else, I'll say so, and give the reasons why. And if I totally lose my mind and get the E-P1, well, you'll never find out, because my credit card will kill me!